In today’s digital age, managing online accounts has become an essential part of our online presence. If you’ve decided that it’s time to bid adieu to Spotify, whether due to personal reasons or a switch to another music streaming service, we’ve got you covered. How to Delete Your Spotify Account is a straightforward process, and this guide will walk you through it, step by step.
Step 1: Be Sure About Your Decision
Before you embark on the account deletion journey, ensure you are certain about this decision. Deleting your Spotify account means losing access to your playlists, saved songs, and followers. If you’re okay with that, let’s proceed.
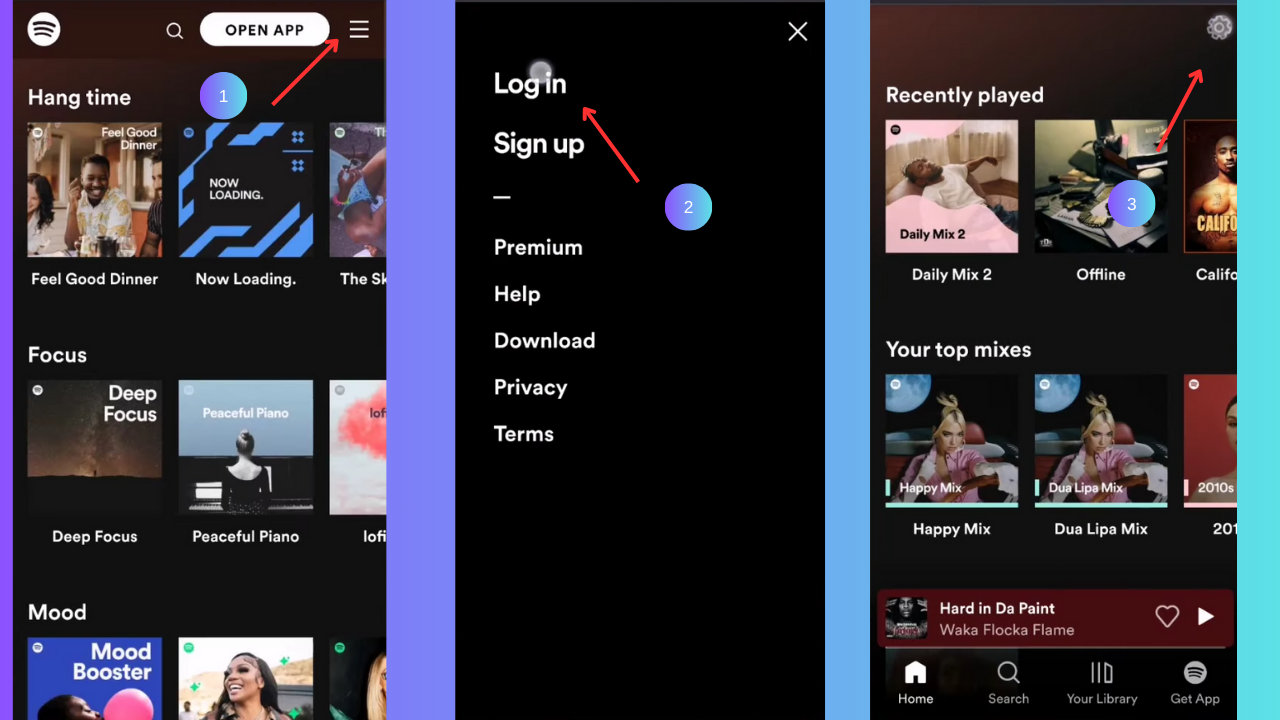
Step 2:Access the Spotify website and sign in to your account by entering your username and password. If you’re already logged in, feel free to proceed without repeating this step.
Step 3: Go to the Account Overview
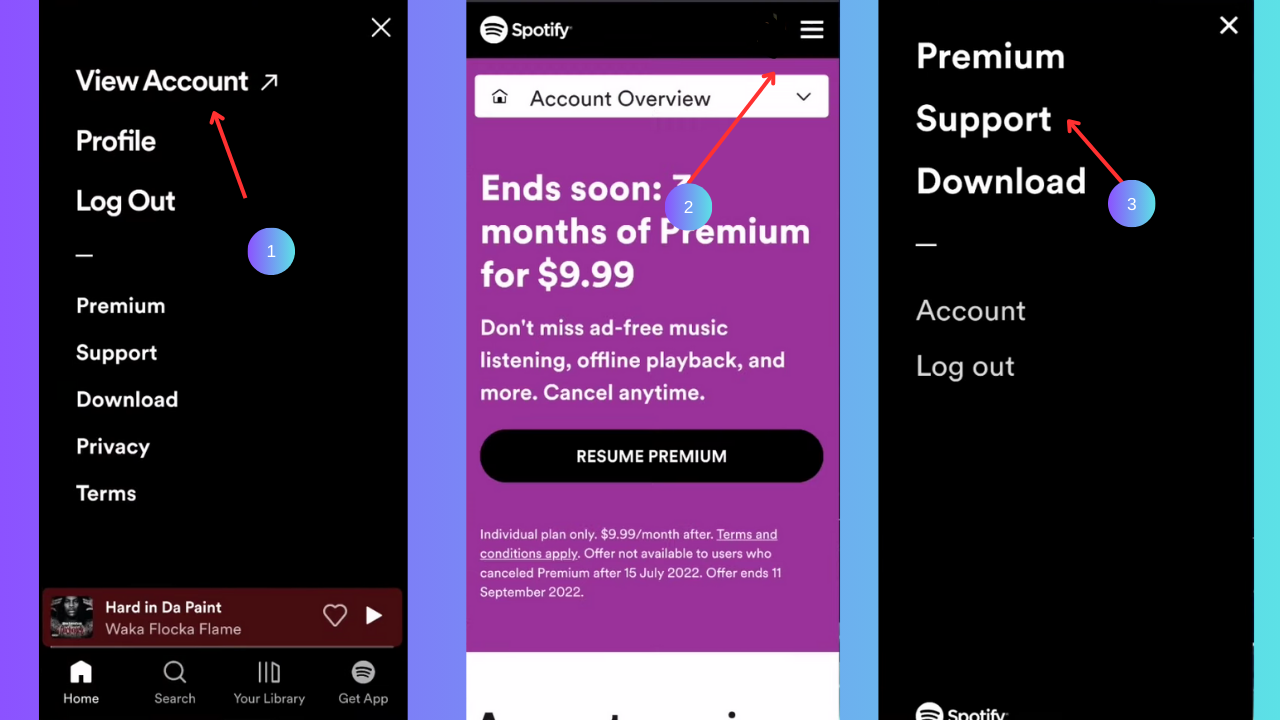
Once you are logged in, click on your profile name at the top right corner of the screen. A dropdown menu will appear. Select ‘Account’ from the list.
Step 4: Navigate to Account Settings
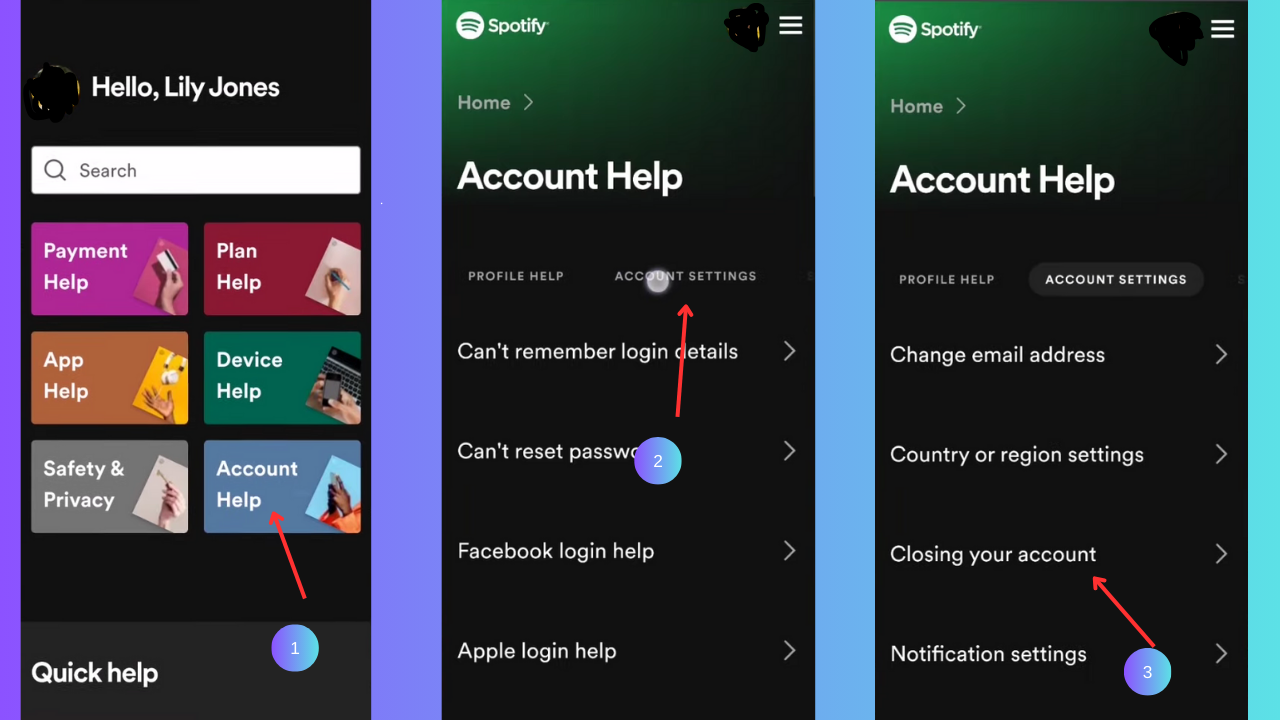
In your account overview, scroll down to find the ‘Account Settings’ section. Choose the appropriate option to access your account settings.
Step 5: Locate and Click on ‘I Want to Close My Account’
In the Account Settings section, find the option that says ‘I Want to Close My Account.’ This is usually located near the bottom of the page.
Step 6: Understand the Consequences
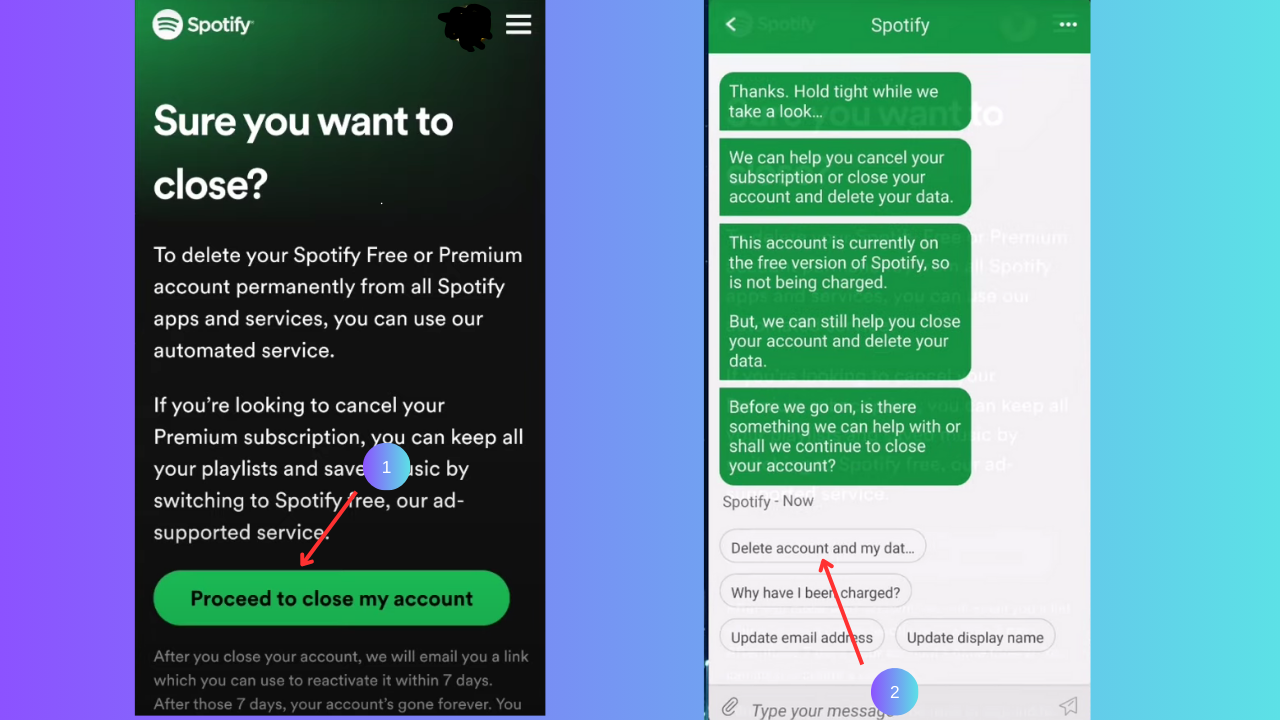
Spotify will provide you with some information about the consequences of closing your account. Read through this carefully to make sure you understand what you’re agreeing to.

Step 7: Confirm Your Email Address
Spotify will ask you to confirm your email address for security reasons. Check your email inbox associated with your Spotify account for a message from Spotify. Please click on the link sent to your email to confirm your identity.
Step 8: Enter Your Password
After confirming your email address, you will be prompted to enter your password to verify that you are the account owner.
Step 9: Specify the Reason for Leaving (Optional)
Spotify might ask you to specify the reason for leaving. This step is optional, but your feedback can be valuable for them.
Step 10: Click on ‘Close Account’
Once you’ve completed all the previous steps, click on the ‘Close Account’ button. Spotify will then process your request to close your account.
Step 11: Verify Your Decision
After clicking ‘Close Account,’ you might be asked to confirm your decision one final time. This is the last step, and once you confirm, your Spotify account will be deleted.
Final Thoughts
Deleting your Spotify account is a simple process, but it’s important to remember that this action is irreversible. Make sure you’ve downloaded any music or playlists you want to keep and that you are ready to part ways with your Spotify history.
Remember, if you change your mind in the future, you can always create a new Spotify account. Take your time, be certain of your decision, and if you’re ready to proceed, follow these steps to close your Spotify account. Good luck.
How to Cancel Spotify Premium
So, you’ve enjoyed the perks of Spotify Premium, but maybe it’s time for a change. Canceling your subscription shouldn’t be a hassle. In this step-by-step guide, we’ll walk you through the process of canceling your Spotify Premium subscription in the most user-friendly way possible.
Step 1: Access Your Account Settings
First things first, log in to your Spotify account on the official website or the mobile app. After logging in, go to your account settings.. On the website, you’ll find it by clicking on your profile name in the top right corner. In the mobile app, it’s usually under ‘Home’ > ‘Settings’ > ‘Account.’
Step 2: Locate Your Subscription
Search for the ‘Subscription’ tab within your account settings. Spotify likes to keep things simple, so finding your subscription details shouldn’t be a challenge. Click on ‘Subscription’ to reveal your current plan information.
Step 3: Review Your Subscription
Here, you’ll see the details of your Premium plan. Take a moment to review the features you’ll be saying goodbye to – offline listening, no ads, and all the fantastic Premium perks.
Step 4: Choose ‘Cancel Premium’
At the bottom of your subscription details, you’ll find the ‘Cancel Premium’ option. Click on it to proceed. Spotify understands that sometimes life happens, so they won’t make this step difficult for you.
Step 5: Confirm Your Cancellation
Spotify cares about its users, so they want to ensure you’re making the right decision. They might offer you some special deals or reasons to stay. But if you’re sure, confirm your cancellation.
Step 6: Check for Confirmation
Once you’ve confirmed, Spotify will send you an email confirming your cancellation. It’s a good practice to double-check your inbox to be certain.
Conclusion:
And there you have it. Cancelling your Spotify Premium subscription is as easy as enjoying your favorite tunes. Remember, if you ever change your mind, Spotify will warmly welcome you back. Enjoy exploring the vast world of music, and feel free to return to Spotify Premium whenever you’re ready. Happy listening.
Also read: How to Get My AI on Snapchat