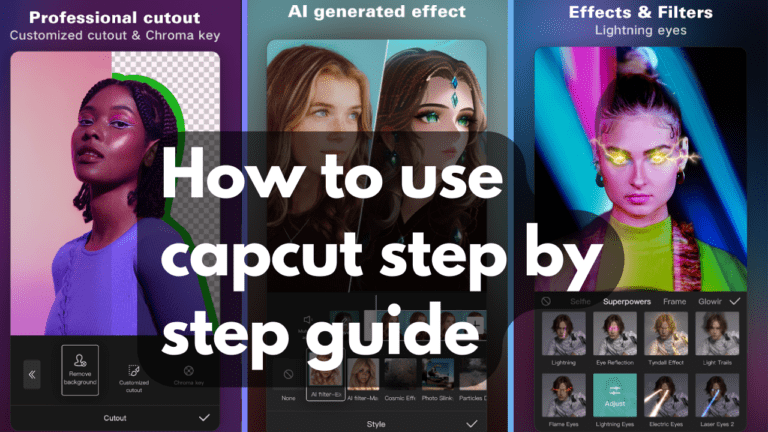
In this digital age, expressing creativity knows no bounds. Thanks to the proliferation of smartphones and user-friendly apps, anyone can be a filmmaker, storyteller, or artist. One such powerful tool that has democratized the art of video editing is CapCut. Designed for both beginners and seasoned editors, CapCut provides a plethora of features to transform your raw footage into polished masterpieces. In this comprehensive guide, we will take you through a step-by-step journey on How to use Capcut, all explained in a simple and easy way
Download and Install CapCut
Before you embark on your creative journey, head to your device’s app store. Whether you are using an Android device or an iPhone, simply search for CapCut and hit that download button. Once the installation is complete, launch the app and get ready to dive into the world of limitless possibilities.
Import Your Footage
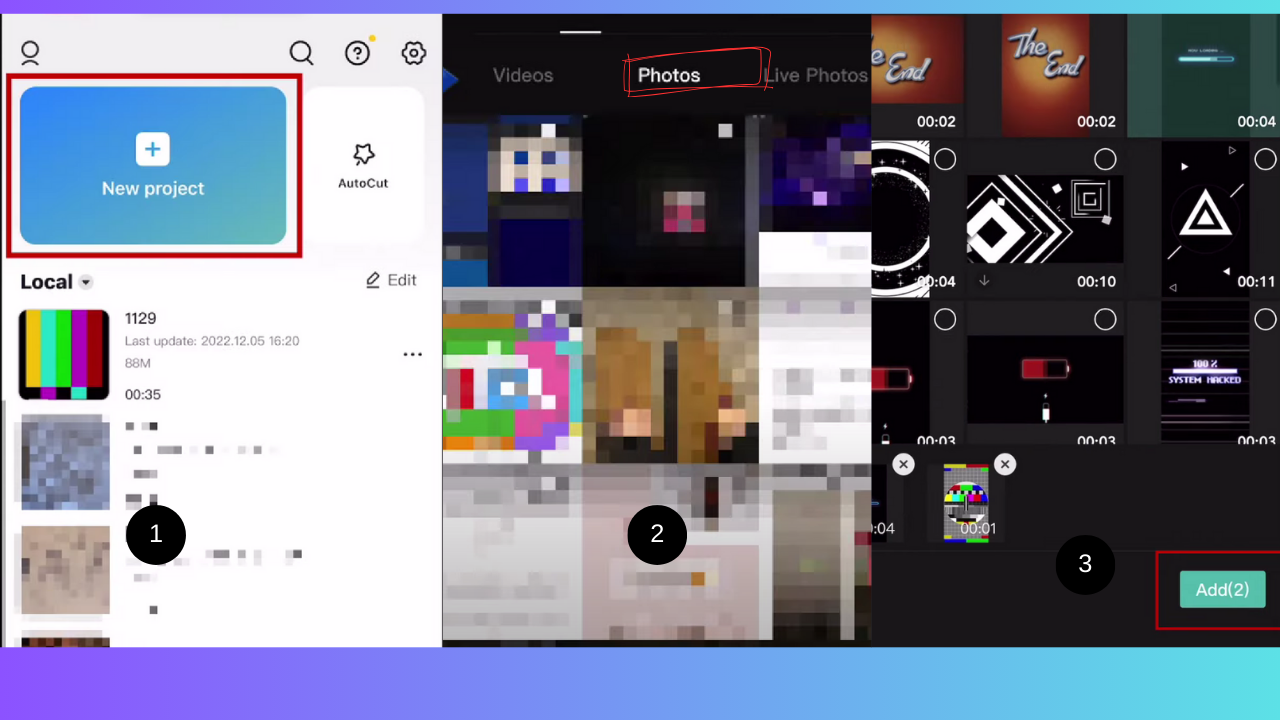
To begin creating a video, open CapCut and tap New Project. Now you can upload media from your camera roll to use for your project. You can upload videos, photos, or live photos. You can also pick stock videos from CapCuts Library to play around with if you like. Select the media you want to use, then tap Add in the bottom right corner.
Familiarize Yourself with the Editing Tools
CapCut boasts an array of user-friendly editing tools. Tap on a clip to reveal options like trim, split, duplicate, and delete. The timeline at the bottom allows you to arrange your clips seamlessly, providing a clear overview of your project’s flow.

Now you can begin editing your video. You can play a preview of your video by tapping the Play button in the middle. To view your preview in full screen, tap the Maximize icon.

To exit the full-screen preview, tap the Minimize icon.

To trim the beginning or end of a clip, tap the clip, then drag the marker at the beginning or end to trim out as much as you’d like. Each of the icons at the bottom represents a menu of video editing features.
The first category is Edit. In this menu, you’ll find a bunch of useful tools for editing your video project. The Split tool will let you make a cut in your video at the point where the Playback marker currently sits. Scroll to the part of your video where you want to make a cut, then tap Split. This will split your clip into two pieces
If you want to cut out part of your video, you can split on either end of the part you’d like to remove, then select that clip and delete it.
Speed

The next tool is Speed. As you might expect, this tool will allow you to speed up or slow down a video clip. Tap a clip you want to adjust the speed of, then tap Speed. You can choose normal to have the speed of your whole clip change, or curve so the speed gradually changes rather than all at once. 1x is regular speed, but if you drag the marker to the left, you can slow down your video, or drag it to the right to speed it up. Tap play on your video preview to see how it looks at the speed you’ve selected.tap the check mark at the bottom to save your changes.
Animation

The next tool is animation. This feature allows you to animate the intro and outro of your clip with animated transitions. You can choose to add a transition into the video, out of it, or a combination of both. Then tap an animation effect to see how it would look on your video. To save it, tap the check mark at the bottom. Repeat to add these to each clip you’d like to add animations to.
Style

The style tool has cool effects you can add to your clips. Some can only be applied to photos, and some are only for videos. Tap one of these to apply it to your clip. The delete function will remove the selected clip.
Volume
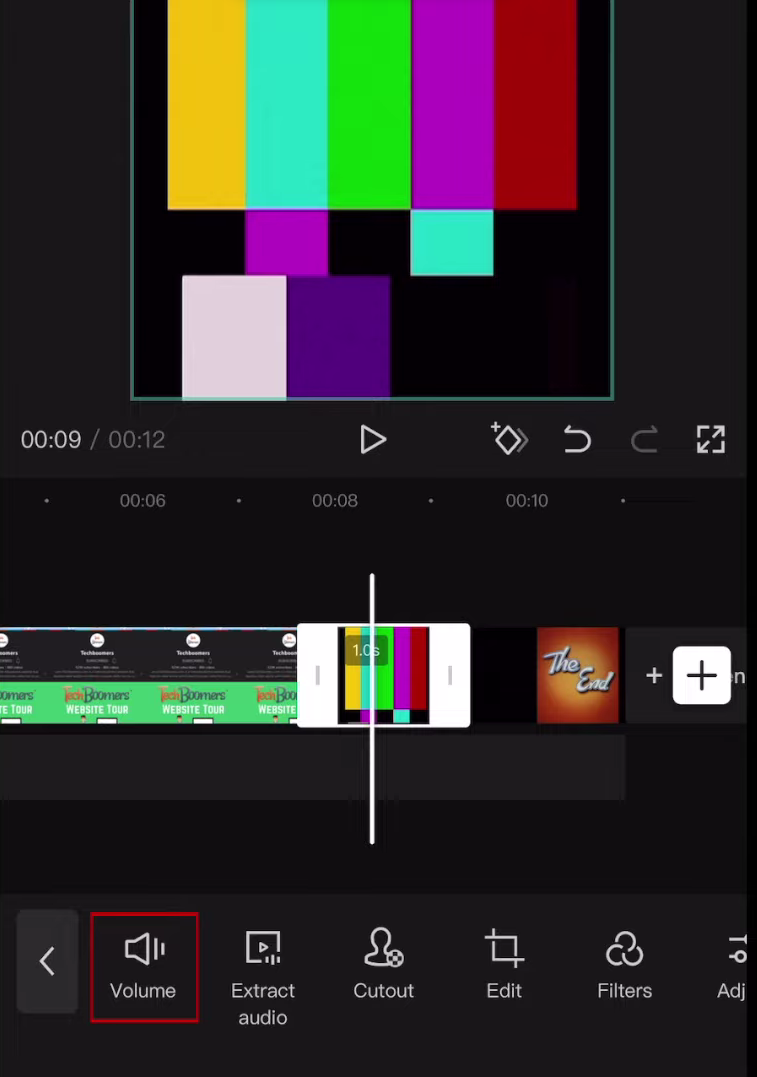
The volume tool allows you to turn the volume of a clip up or down. Make sure to tap the check mark to save your changes. If you want to separate the audio from your video so you can edit the audio separately, tap extract audio.
cutout tool

The cutout tool can be used to remove the background of a video. This will work best if your video has a solid-colored background.
Edit tool

With the edit tool, you can mirror, rotate, or crop your clip.
Add color and Effects

Capcut also has lots of color filters you can use to stylize your video. Tap a filter to see how it looks on your clip. You can adjust the intensity of the filter by using the slider bar at the bottom. If you want a filter to be constant across your entire video, tap Apply to All clips
A well-placed transition can elevate your video’s quality. CapCut offers a diverse selection of transitions, from smooth fades to dynamic effects. Experiment with different options to find the one that suits your project best. Additionally, explore the myriad of filters and effects to add a touch of cinematic flair to your footage.
Adjust tool
With the Adjust tool, you can adjust your clip’s brightness, contrast, saturation, and more. You can also tap Apply to All to ensure the adjustments are consistent across all your clips if you like.
Enhanced tool

With the Enhanced tool, CapCut can touch up your face or body. The face tools can be used to smooth your skin, whiten your teeth, or even add makeup. The Body tools can add a slimming effect, make your legs appear longer, and more. These effects can also be automatically applied across all clips for consistency.
mask tool

The mask tool can be used to cover everything but a specific selection of your video. For example, you could mask half of your video, everything but a small circle of it, one horizontal strip, etc. Tapping overlay will turn the selected clip into an overlay rather than being in the main video timeline.Tap replace to select a different video from your device to use in place of the selected clip.
Stabilize tool

The Stabilize tool can be used to reduce any shakiness in a clip.
Opacity tool

With the Opacity tool, you can make a clip more transparent.
voice effects

Capcut also has voice effects that are similar to those on TikTok. Apply one of these to distort or enhance voices in your video.
Reduced noise

Reduced noise can be enabled to reduce background noise, such as wind.
copy & reverse & freeze

Tapping copy will duplicate your clip. Tapping reverse will make the selected clip play backwards. Tapping freeze will create a three-second freeze frame at the point where the Playback marker sits. You can then drag the end of the freeze frame clip to make it shorter or longer.
Audio

you can add sounds, including tracks from CapCut’s audio library, or you can link your TikTok account to use sounds from the TikTok app. You can also add sound effects to enhance your video. If you’d like to use audio from another video on your device for this project, tap Extracted. Then select the video you’d like to pull audio from. Capcut will import only the audio portion of that video to use in your project.
Voice-Over

Voice-over, which allows you to record a voice-over to play over your video. Move the Playback marker to the point in your video where you want your voice-over to start. Then, hold down the Record button to record your voice-over and release it when you’re done. You can move, trim, and edit voice-over clips the same way you would with video clips.
Text

you can add text overlays to your video. Tap Add Text to make a new text box. You can type in whatever you’d like it to say and customize the font, and style of text, including color and size, text effects, animation, and background bubble if you like. You can also drag the text clip to move it to the part of your video where you want that text to appear. You can drag the ends of the clip to adjust the length of your text. If you want to reposition the text, drag it on the screen to place it where you want or use two fingers to pinch, zoom, or rotate it.
Stickers and automatic captions

The next tool allows you to add stickers. You can also add automatic captions to show what’s being said in your video, or automatic lyrics if your video is of a song.
Draw
This will allow you to doodle on your video and create your own hand-drawn stickers.
The main editing menu also has tools to add stickers and overlays, as well as filters and the adjustment tool. The effects menu has options to add fun video effects as well as body effects. The format option allows you to choose the sizing ratio for your video. The canvas category allows you to choose a background color or image, or blur your background if you want.

When you’re all finished editing your project on CapCut, select the resolution and frame rate you want to export your video as. The higher the resolution and frame rate, the more clear your video will be, and the larger the file size will be. To save your video, tap the Export icon. When the export is complete, your video will be saved to your device’s camera roll. You can then upload your edited video to TikTok, YouTube, Instagram, or whatever other platform you like.

Conclusion: Unleash Your Creative Potential
CapCut, with its intuitive interface and powerful features, empowers everyone to be a storyteller, a filmmaker, and an artist. By following these step-by-step instructions, you can unlock the full potential of CapCut and bring your creative visions to life.
Also Read : Best free video editing app for android without watermark